All of the products and services we feature are chosen independently. If you click through links we provide, we may earn a commission. Learn more
Written by: Emily Chen
How To Remove eSIM from iPhone
- Updated: September 30, 2023 | Published:
The eSIM (embedded SIM) is a digital SIM card which allows you to activate a cellular plan without the need for a physical SIM card. As technology advances, many modern smartphones, including Apple’s iPhone, have adopted the eSIM feature for additional convenience and functionality.
However, there may come a time when you need to remove or delete an eSIM from your iPhone. The following article will guide you through the steps necessary to achieve this.
Before proceeding, ensure you have backed up any important data and understand that removing an eSIM will disable the associated cellular plan.

Step-By-Step Process of Removing an eSIM
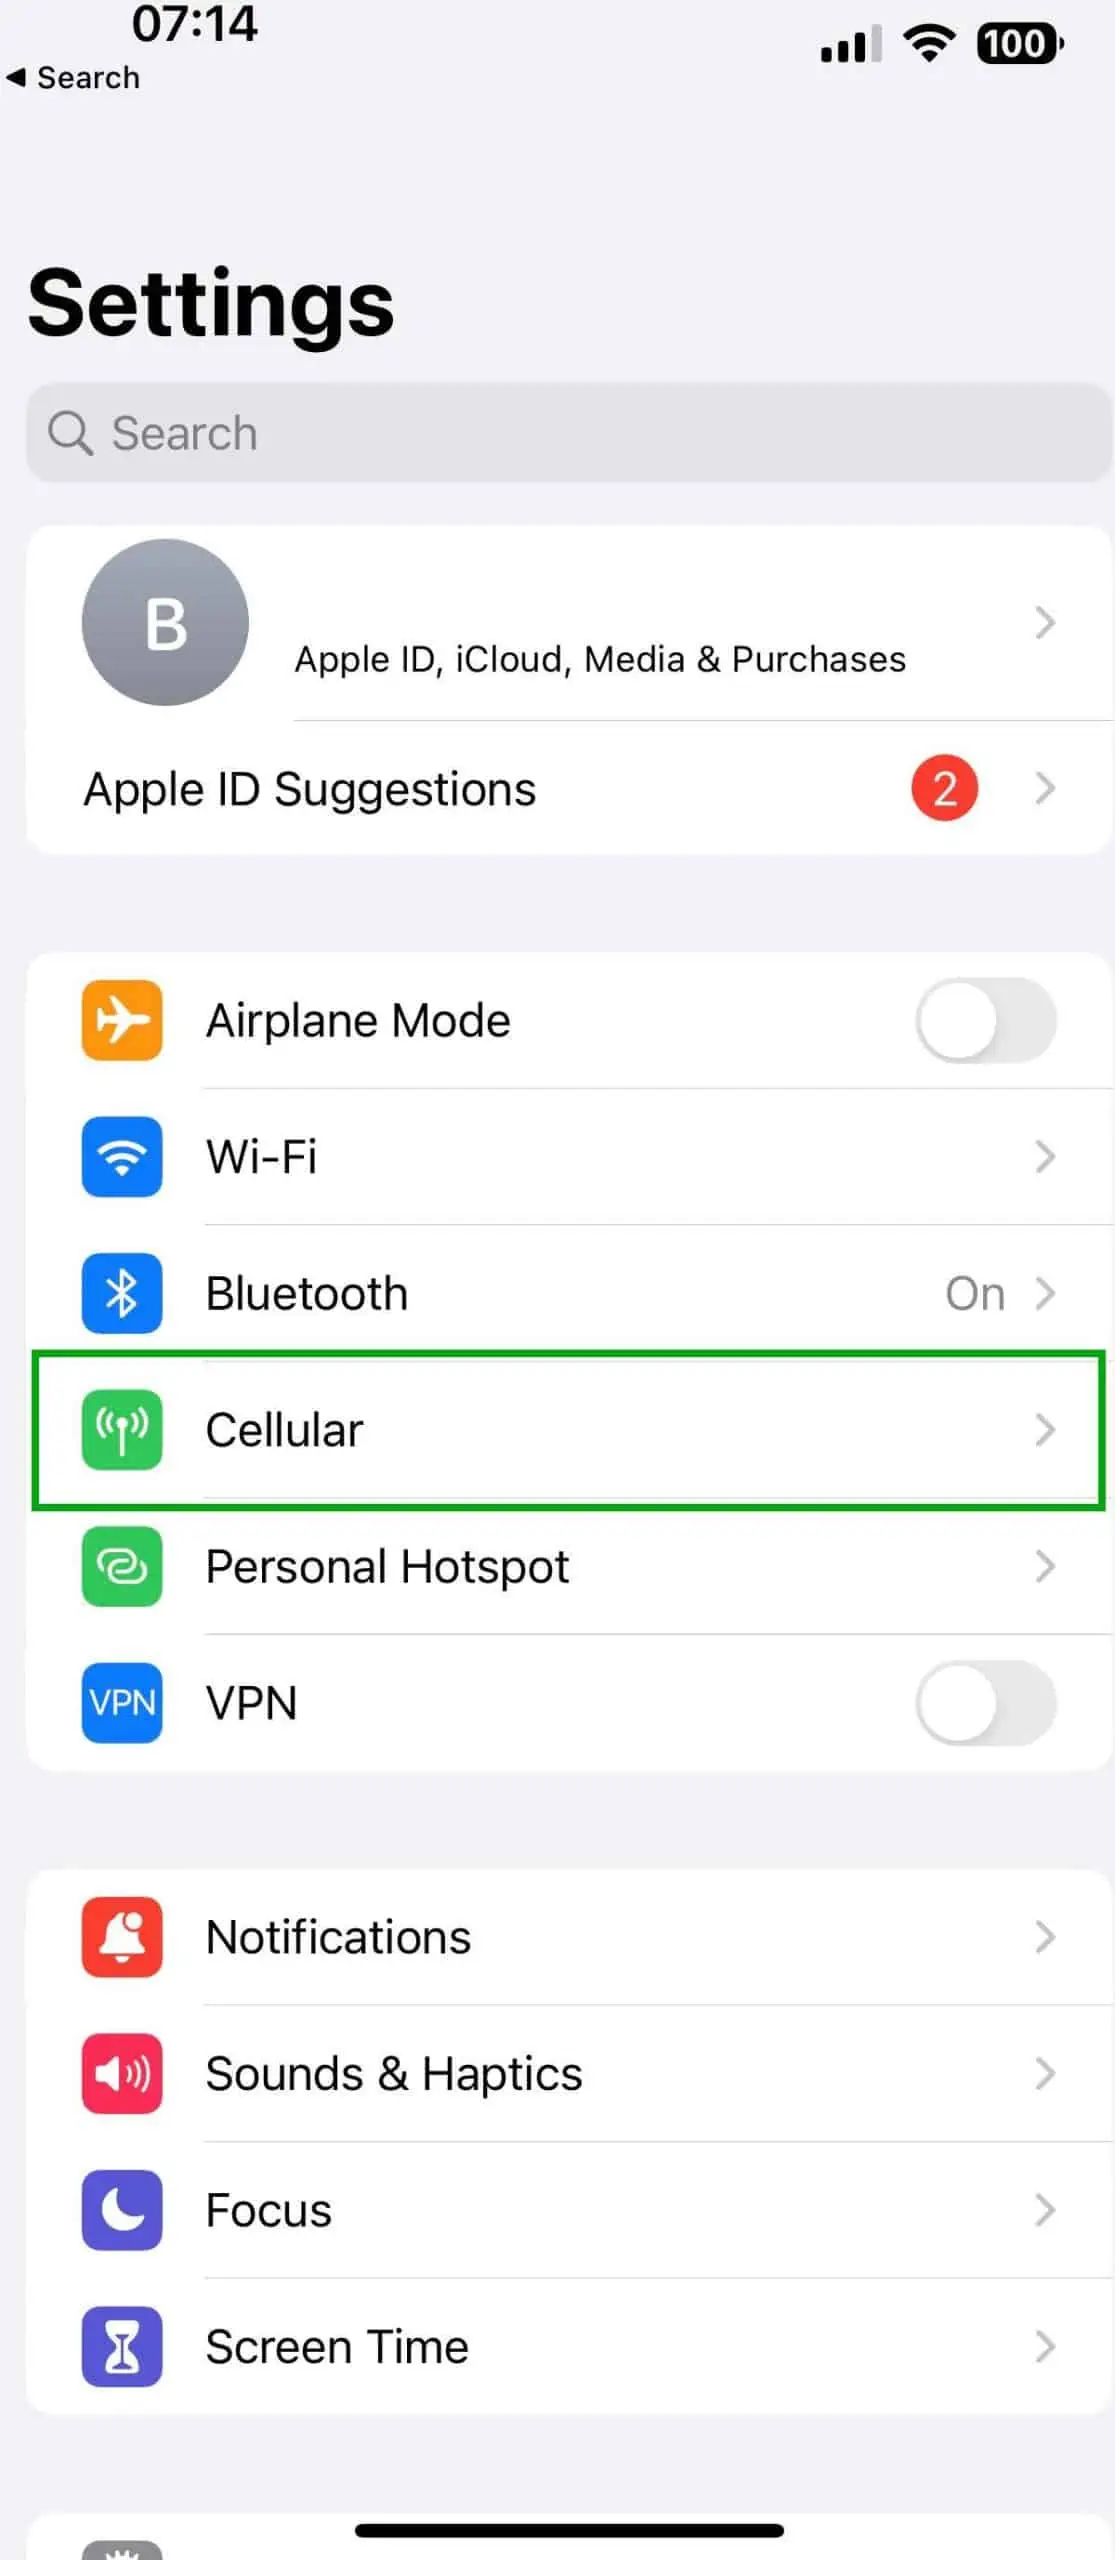
Step 1: Open 'Settings'
Step 2: Tap 'Cellular'
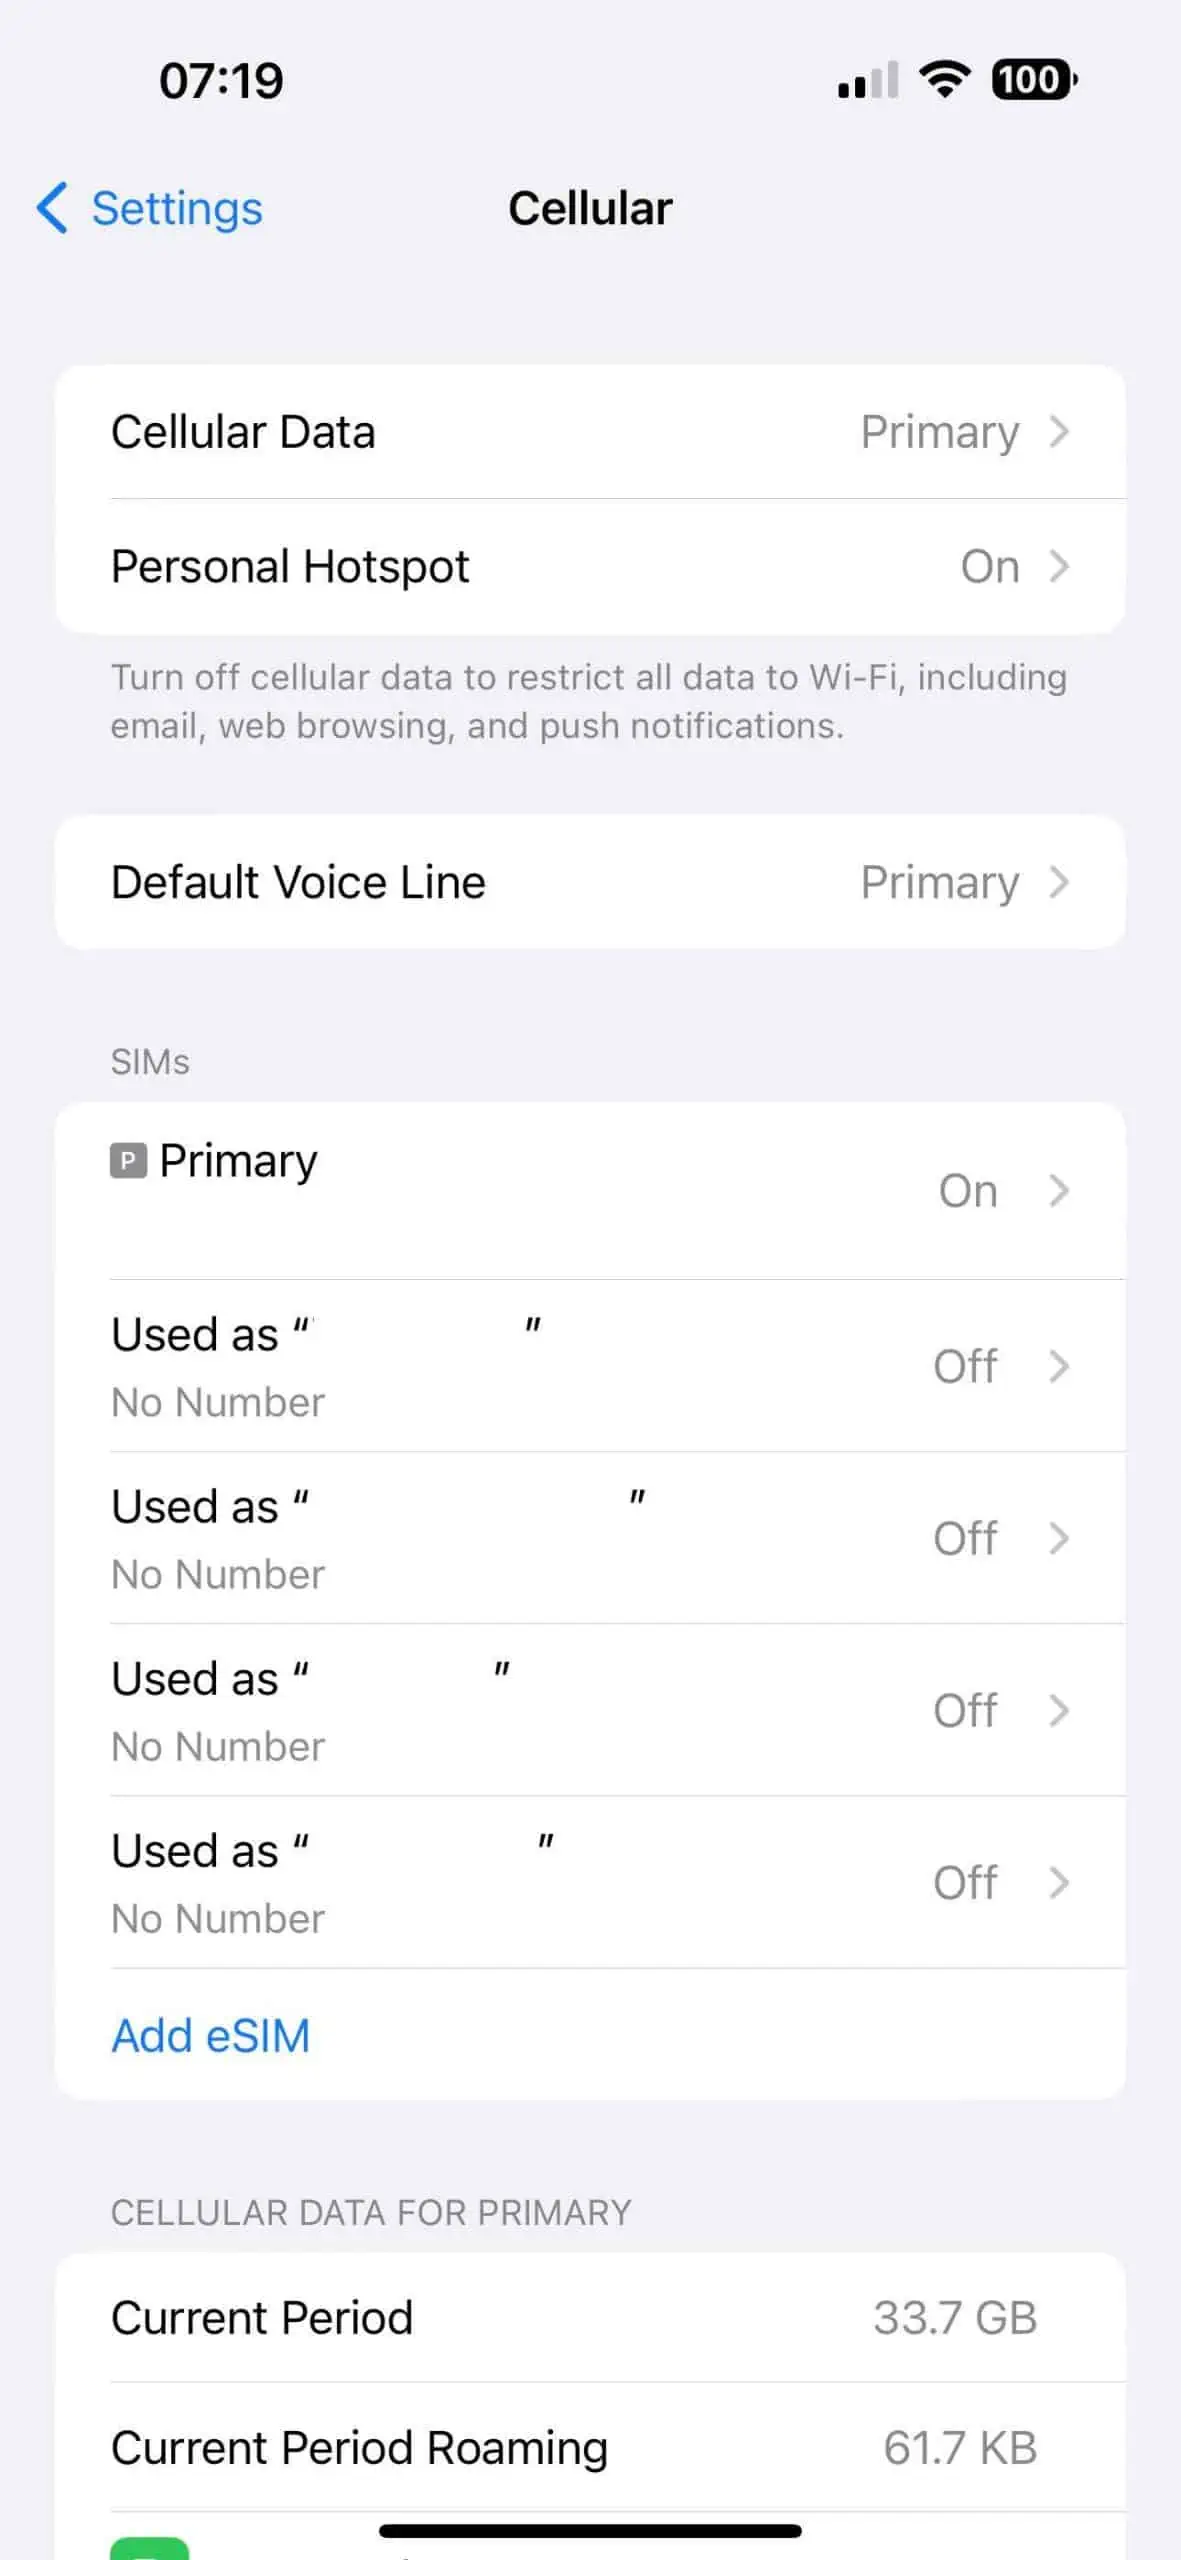
Step 3: Select 'Cellular Plans'
Once you’re in the Cellular menu, you’ll see an option for ‘Cellular Plans.’ Tap on it. Here, you will find a list of all the cellular plans currently active on your iPhone.
On the new versions of iOS, you can skip this step as you will already see all the SIM Cards & eSIM plans.
Step 4: Choose the eSIM Plan
Step 5: Tap 'Remove Cellular Plan'
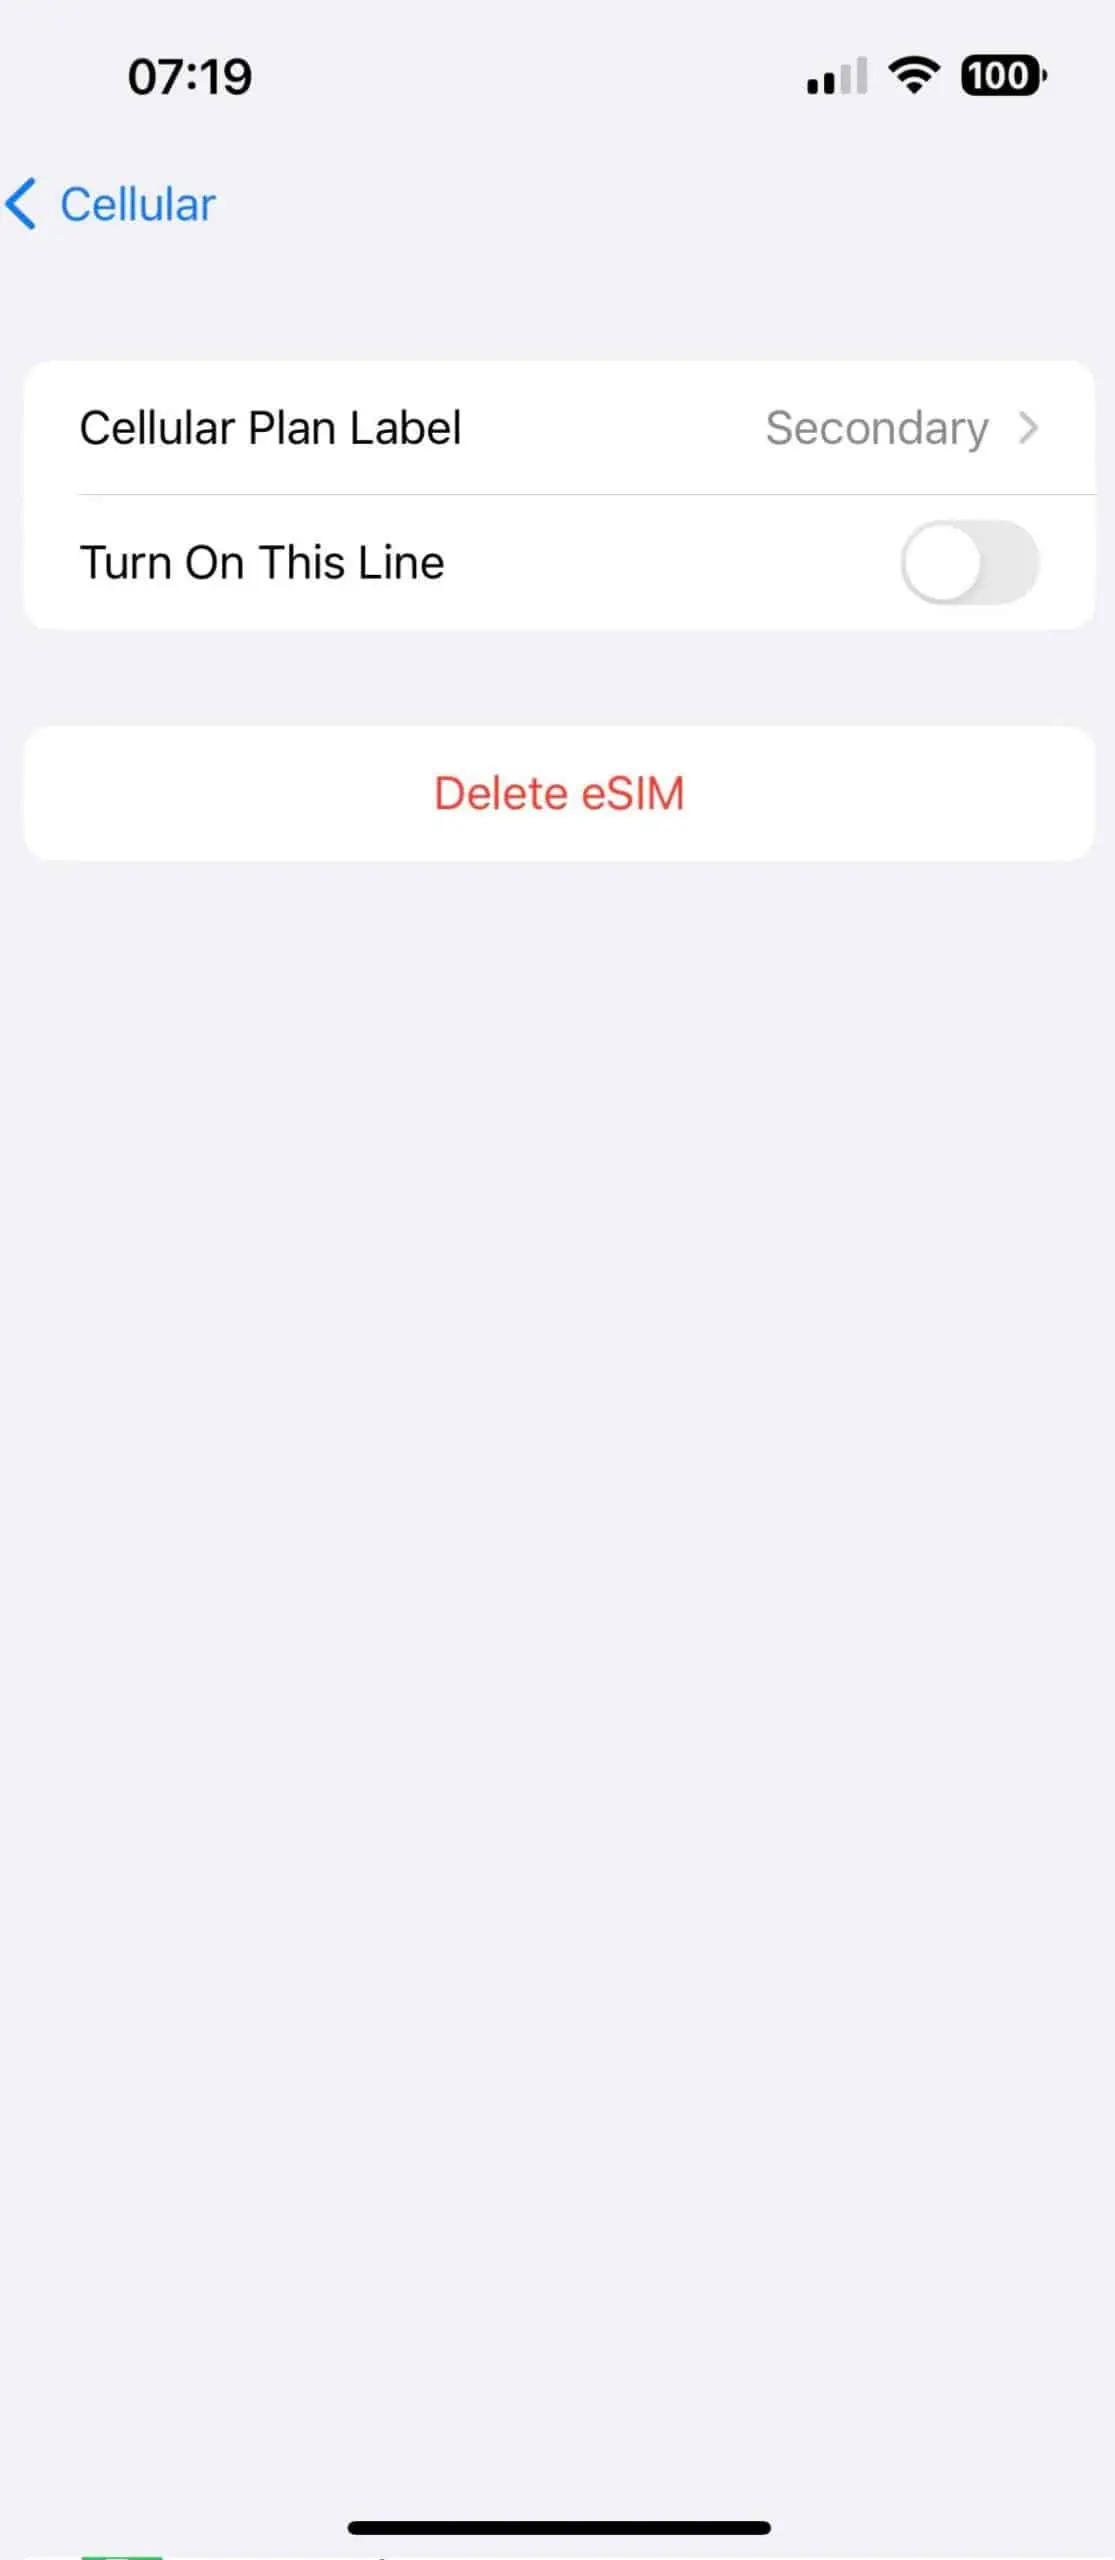
Once you’ve selected the eSIM plan, you will see a range of options related to that plan. At the bottom of it, you’ll find ‘Remove Cellular Plan’ or ‘Delete eSIM’. Tap on this option.
Step 6: Confirm the Action
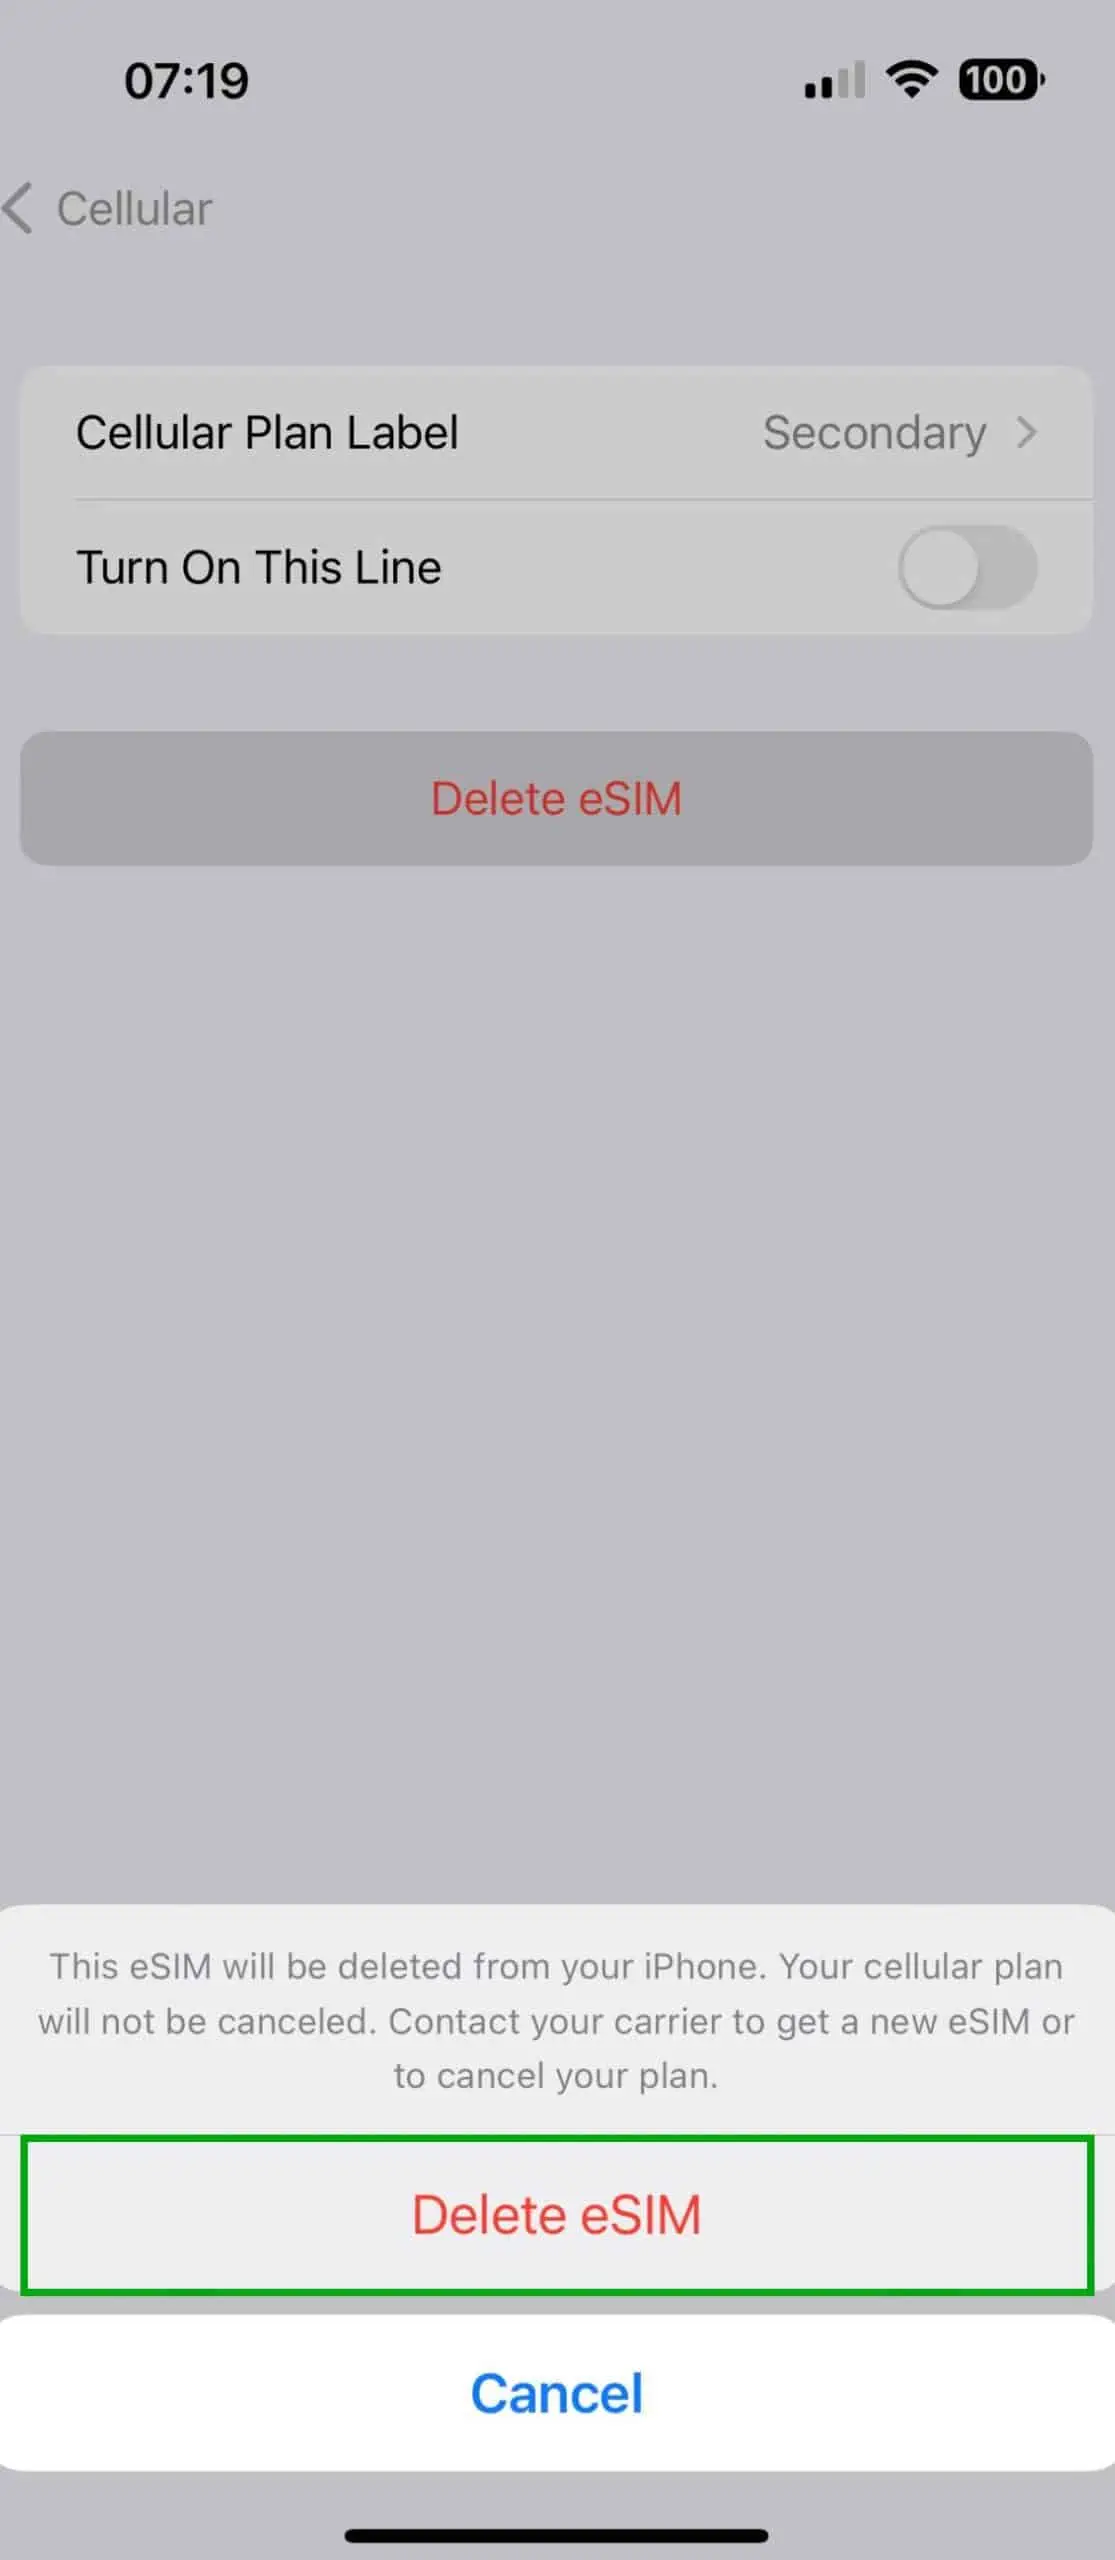
A pop-up will appear, asking you to confirm whether you want to remove the cellular plan from your iPhone. If you are sure, tap ‘Remove’ or ‘Delete eSIM’ to confirm the action.
Note that once you confirm, the plan will be removed immediately and you won’t be able to undo this action.
And that’s it! You’ve successfully removed an eSIM from your iPhone.
Remember that by removing the eSIM, you’re also removing the cellular plan associated with it, which means your phone will no longer have access to cellular data or voice services through that plan. If you need to use the plan again in the future, you would need to re-add the eSIM.
Be aware that eSIMs work differently than traditional SIM cards. While removing a traditional SIM card simply requires physically ejecting the card, eSIMs are entirely digital, which means they need to be managed through the device’s settings.
This can be an advantage, as it allows for easier switching between plans and carriers, but it also means you need to be careful when managing your eSIMs to ensure you don’t accidentally remove a plan that you still need.
Now that you understand how to remove an eSIM from your iPhone, you can manage your cellular plans with greater confidence. Whether you’re switching carriers, or just need to clean up unused plans, the ability to manage your eSIM is a vital part of using your iPhone to its fullest potential.
By entering your email & signing up, you agree to receive promotional emails on eSIMs and insider tips. You can unsubscribe or withdraw your consent at any time.

About The Author


Spread the Word, Share the Joy
Compare eSIMs
Why keep the secret to yourself? Spread the joy of eSIMradar and let everyone in on the eSIM experience!
Easy eSIM Comparison for Your Needs
Simplifying your search! Easily compare eSIM plans tailored to your specific needs
Coverage in 210+ Countries
Benefit from our extensive eSIM comparison with 30+ providers in over 210 destinations.
Save money without second-guessing
Our platform helps you maximize value, ensuring competitive prices.
Enjoy Hassle-Free Travel Abroad
Whether you’re on holiday or a business trip abroad, stay connected with ease and focus on enjoying your experiences,
Find Your Perfect eSIM & Exclusive Deals!
Find your ideal eSIM effortlessly and stay connected in style wherever your adventures take you! Get exclusive deals and discounts at your fingertips, ensuring you get connected for less on your travels!