All of the products and services we feature are chosen independently. If you click through links we provide, we may earn a commission. Learn more
Written by: Emily Chen
How To Install eSIM on iPhone
- Updated: September 30, 2023 | Published:
In today’s digital age, the eSIM (embedded SIM) has emerged as a revolutionary technology, offering a more streamlined approach to cellular connectivity.
Unlike the traditional physical SIM cards that we insert into our phones, eSIM is a digital version, eliminating the need for physical handling.
This article delves deep into the process of installing and using eSIM on your iPhone.
Prerequisites for eSIM Installation
Before diving into the installation process, it’s crucial to ensure a couple of things:
- iPhone Model Compatibility: Not all iPhone models support eSIM. As of now, iPhone XS and later models are equipped with this feature.
- Carrier Support: eSIM technology requires carrier support. It’s essential to check with your cellular service provider if they offer eSIM services.
Setting Up eSIM on iPhone
The process of setting up eSIM is straightforward:
- During iPhone Setup: If you’re starting with a brand new iPhone, you’ll have the option to activate your eSIM during the initial setup. This is possible if your carrier supports either eSIM Carrier Activation or eSIM Quick Transfer.
- eSIM Carrier Activation: With this method, the carrier assigns an eSIM to your iPhone at the time of purchase.
- eSIM Quick Transfer: This allows you to transfer the SIM from your previous iPhone to your new one without contacting the carrier.
For those using the iPhone 14 model in the U.S., the device activates with an eSIM by default. Simply turn on your iPhone and follow the on-screen instructions.
5 Ways To Install eSIM on iPhone
1. Using eSIM Carrier Activation
eSIM Carrier Activation is a seamless process:
- Activation: If an eSIM was pre-assigned to your iPhone at purchase, activating it is as simple as turning on your device and following the on-screen prompts.
- Switching to iPhone: If you’re transitioning from another device (like Android), you’ll need to contact your carrier to transfer your number to the iPhone via eSIM Carrier Activation or by scanning a carrier-provided QR code.
2. Using eSIM Quick Transfer
This method is especially handy for those upgrading their iPhones:
- SIM Transfer: Some carriers allow SIM transfers from your old iPhone to the new one without any additional steps. This also includes the option to convert your physical SIM to an eSIM.
- Transferring After Setup: If you’ve already set up your new iPhone, you can still transfer your SIM. Navigate to Settings > Cellular > Add Cellular Plan and follow the prompts.
3. Converting Physical SIM to eSIM on the Same iPhone
For those looking to make the complete digital switch:
- Conversion Process: Head to Settings > Cellular and select “Convert to eSIM”. If this option isn’t visible, your carrier might not support direct conversion. In such cases, you’ll need to contact them for further assistance.
4. Scanning a QR Code or Using a Carrier App
For carriers that don’t support the aforementioned methods:
- QR Code Activation: During iPhone setup, when you reach the “Set Up Cellular” screen, choose “Use QR Code” and follow the instructions. If you’re trying to activate eSIM post-setup, you’ll need to get a QR code from your carrier. Use the Camera app to scan this code, and then follow the on-screen instructions.
- Carrier App Activation: Some carriers have dedicated apps for eSIM activation. Download the app from the App Store and follow the in-app guidelines.
5. Manually Entering eSIM Information
In rare cases, you might need to input eSIM details manually:
- Manual Entry: Contact your carrier to obtain the necessary eSIM details. Then, go to Settings > Cellular (or Mobile Data) > Add Cellular Plan > Enter Details Manually. Input the provided details.
Troubleshooting and Additional Resources
eSIM technology is relatively new, and you might encounter some hiccups:
- Setup Issues: If you face challenges during eSIM setup, Apple provides a dedicated support page to assist you.
- Erasing eSIM: If you need to erase your eSIM for any reason, ensure you know the process to avoid any data loss.
- Dual SIM with eSIM: iPhones with eSIM support also offer Dual SIM capabilities, allowing you to use two numbers simultaneously.
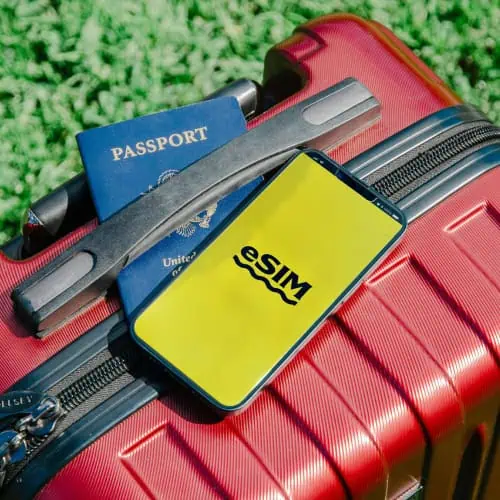
- Traveling with eSIM: One of the significant advantages of eSIM is the ease of switching plans, especially when traveling abroad. Ensure you’re familiar with the process to make the most of this feature.
eSIMs mark a significant step towards a more digital and convenient future. With the ability to switch carriers without the need for physical SIM cards, eSIM not only offers flexibility but also a more streamlined user experience.
As with any new technology, there might be a learning curve, but with this comprehensive guide, you’re well-equipped to navigate the world of eSIM on your iPhone.
By entering your email & signing up, you agree to receive promotional emails on eSIMs and insider tips. You can unsubscribe or withdraw your consent at any time.

About The Author


Spread the Word, Share the Joy
Compare eSIMs
Why keep the secret to yourself? Spread the joy of eSIMradar and let everyone in on the eSIM experience!
Easy eSIM Comparison for Your Needs
Simplifying your search! Easily compare eSIM plans tailored to your specific needs
Coverage in 210+ Countries
Benefit from our extensive eSIM comparison with 30+ providers in over 210 destinations.
Save money without second-guessing
Our platform helps you maximize value, ensuring competitive prices.
Enjoy Hassle-Free Travel Abroad
Whether you’re on holiday or a business trip abroad, stay connected with ease and focus on enjoying your experiences,
Find Your Perfect eSIM & Exclusive Deals!
Find your ideal eSIM effortlessly and stay connected in style wherever your adventures take you! Get exclusive deals and discounts at your fingertips, ensuring you get connected for less on your travels!